Video Tutorial
If you click on the bottom righthand corner of the video, you can enlarge this video tutorial to fit your full screen for a better view. (To close the full screen view, hit your esc button on your keyboard.)
Screenshot Guide
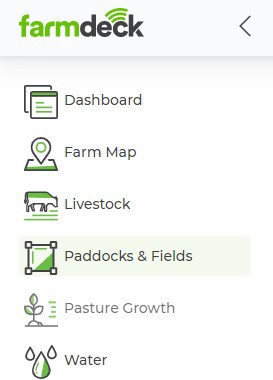
Step 1: Navigate to the main menu on the left-hand side of the page. Scroll down and click on the Paddocks & Fields button.
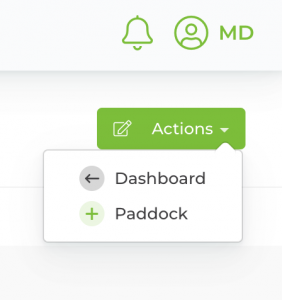
Step 2: Once your main page opens, navigate to the right-hand side of the page. Click on the green Actions button. A dropdown list will open. Click on + Paddock.
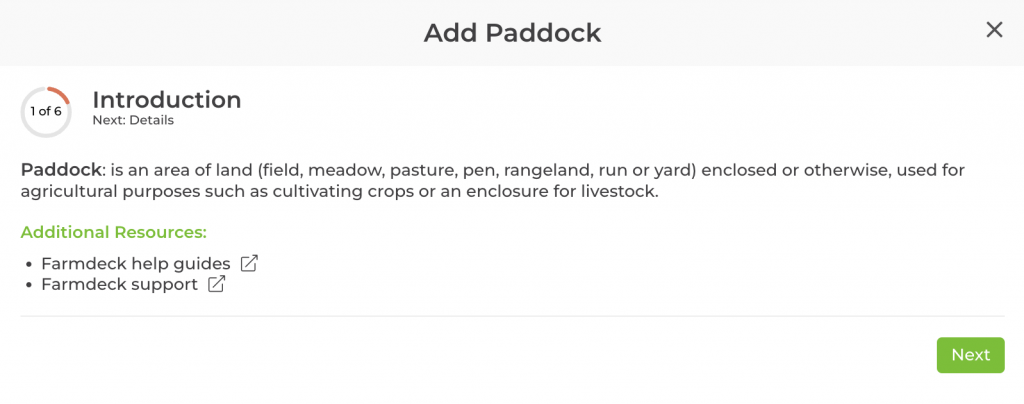
Step 3: A pop-up box will open with an Introduction and additional resources that you can refer to as you set up your first paddock. Click the green Next button to start filling in your details.
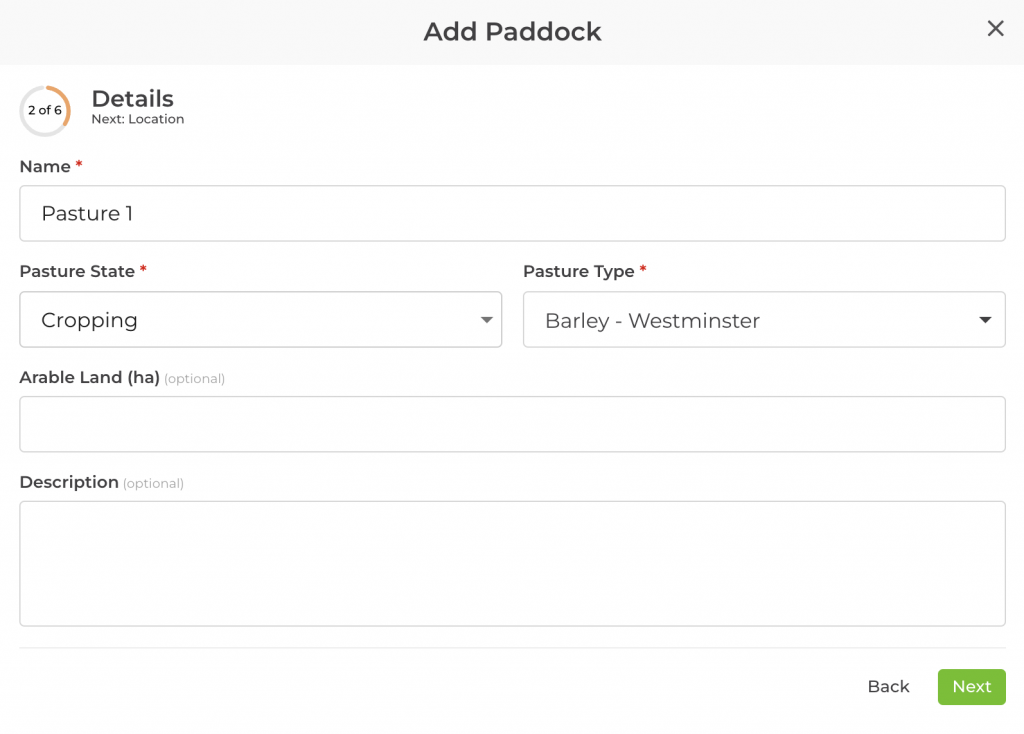
Step 4: Here you can fill in your paddock information. Click the green Next button once you have filled in all the information required.
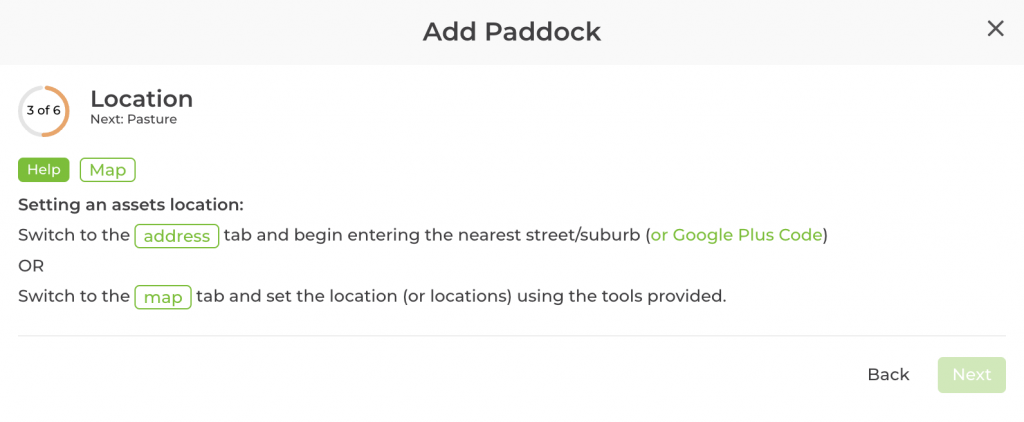
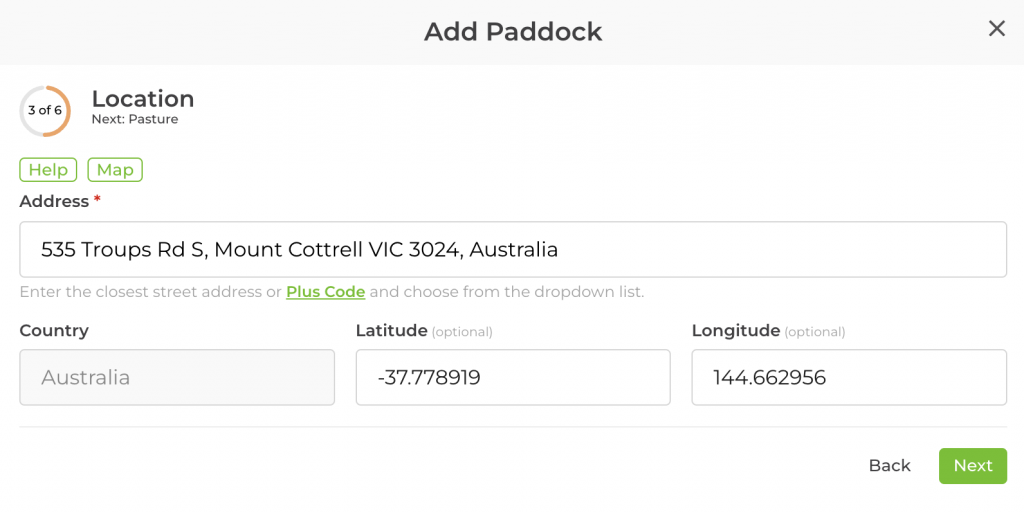
Step 5: After clicking Next, you will be prompted to select the location of the paddock. You have two options, you can either enter an address or you can select its location on a map. Navigate to either the Map or enter your Address by clicking ‘Map’ or ‘Address’ in the green text with the the green border.
Step 6: If you have clicked Map, you will be shown a map (for instructions on how to add your location based on address scroll down to Step 8) . To zoom out, use the + and – buttons on the left. To move around click on the hand tool (located in the toolbar at the top) and move the map to find your paddock’s location.
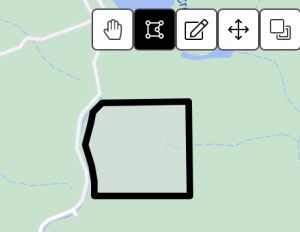
Note: If you hover your mouse across any of the buttons you will see what each is for.
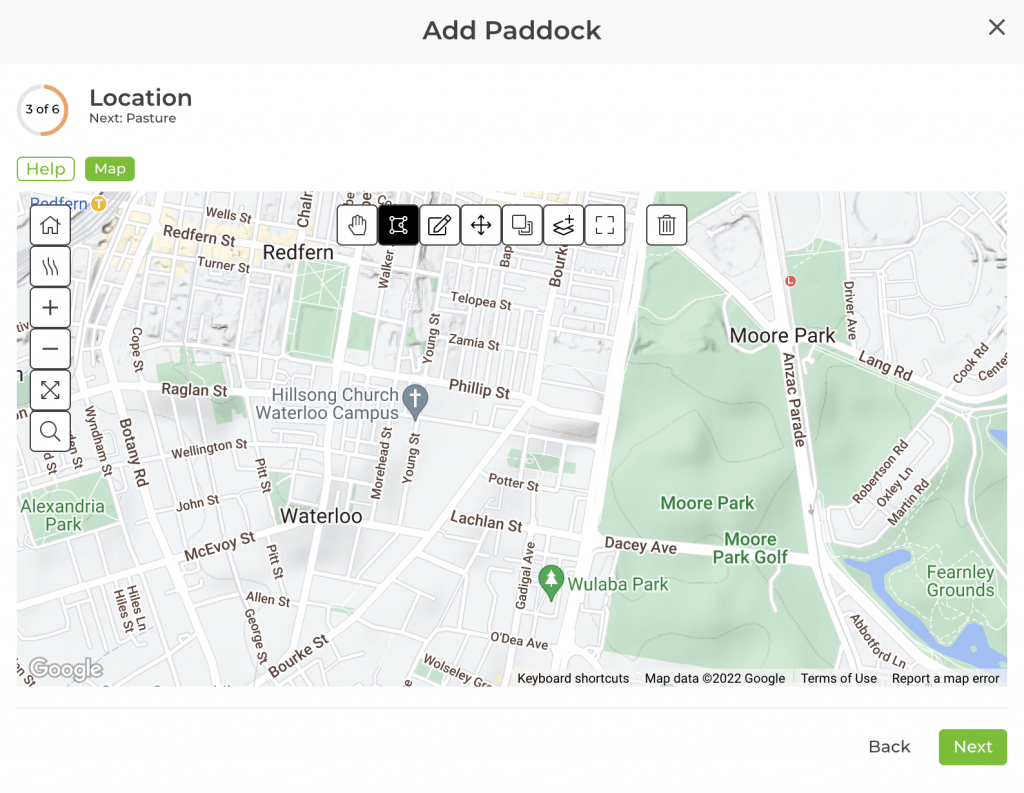
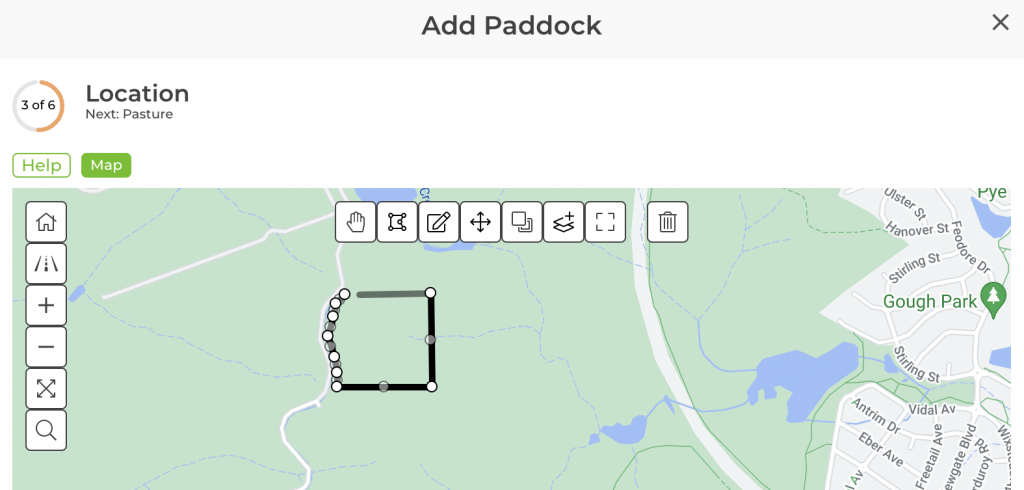
Step 7: To draw your paddock, click on the polygon tool (next to the hand tool). Click on the map to start draw the starting point of your paddock. To mark off the points of your paddock, click along sections of the map to outline your paddock. Small circles will be placed on your map with every click. Your last click to finish your paddock’s shape will be on top of the first click (your starting point).
To edit your paddock, select the edit tool (two buttons down from the hand tool at the top) to select move the circles. You can also use the trash icon to delete the entire shape and start over.
Click Next once you are happy with the shape of your paddock.
Step 8: Alternatively, if you clicked Address then you will be provided with an area to enter your paddocks address. Click Next once you have entered your address.
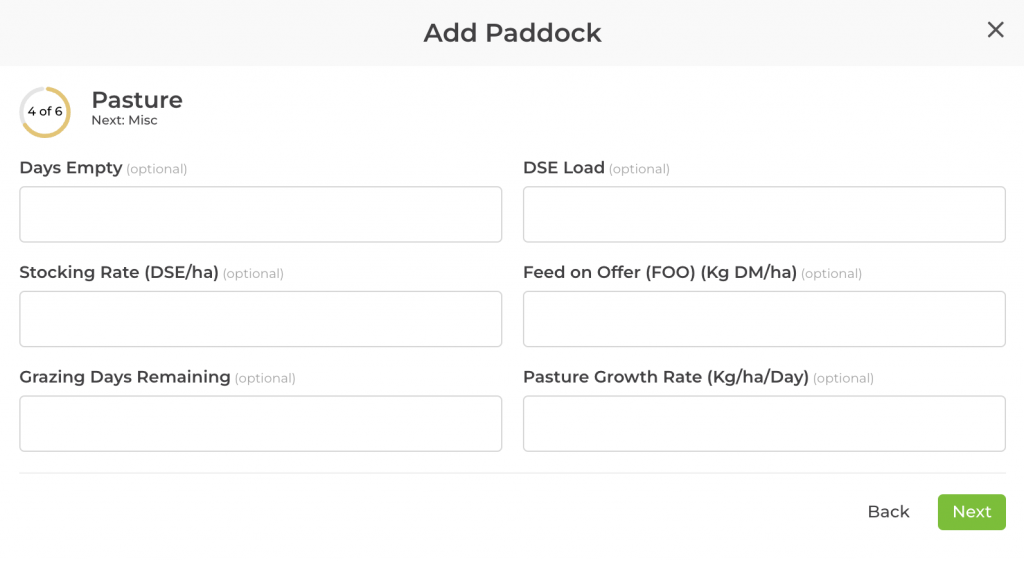
Step 9: Fill in your pasture information and click Next.
Note: The screen below may look different depending on your selections at the start.
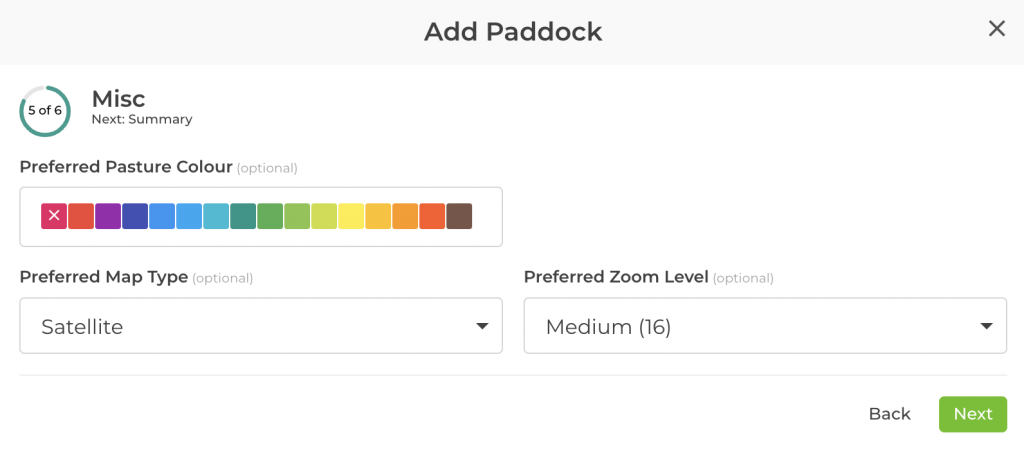
Step 10: Select your preferred pasture colour, map type and zoom level and click Next.
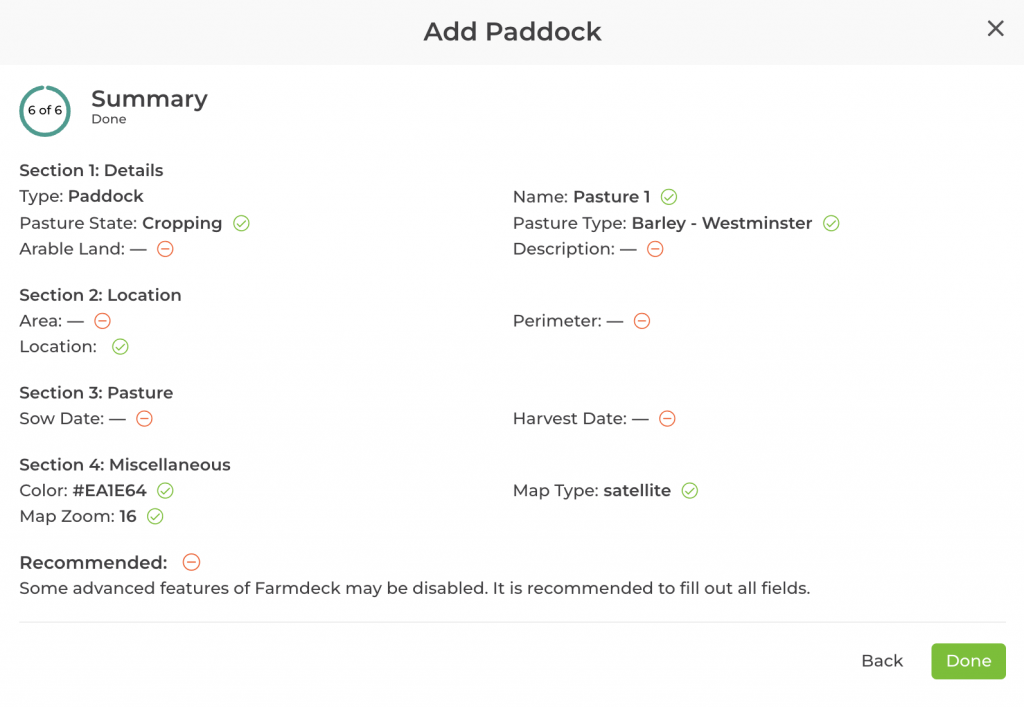
Step 11: Finally, you will receive a summary of the paddock that you want to create. Click Done to add your new paddock onto your main page.