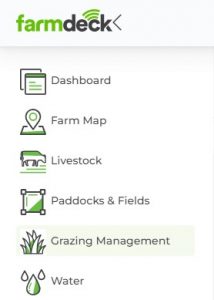
Step 1: Navigate to the main menu on the left-hand side of the page. Scroll down and click on the Grazing Management button.
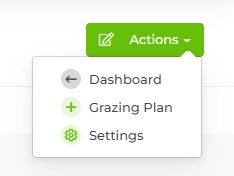
Step 2: When your Grazing Management main page opens, navigate to the right-hand side of the page. Click on the green Actions button. A dropdown list will open. Click on Grazing Plan.
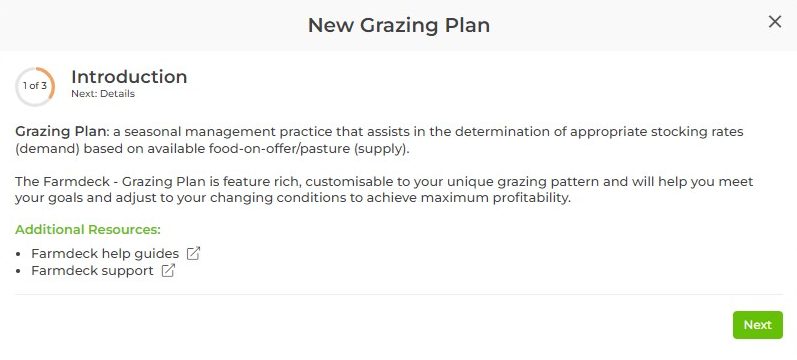
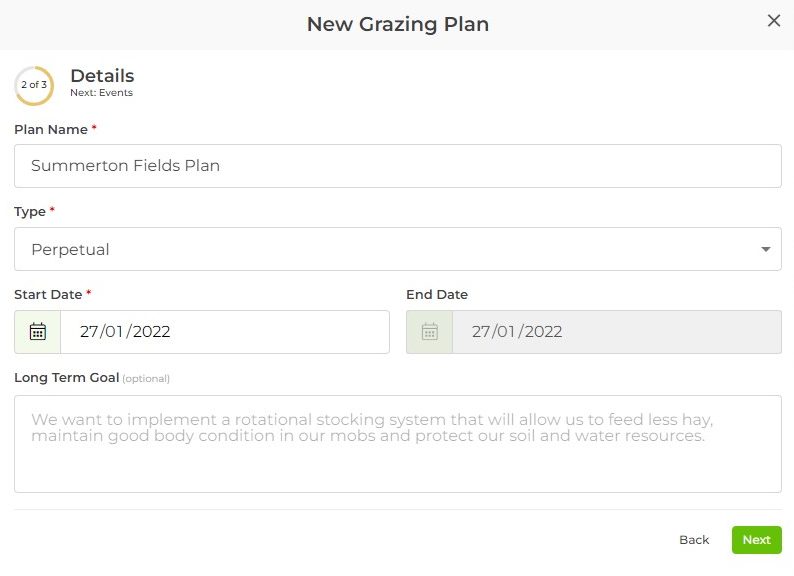
Step 3: A pop-up box will open explaining the grazing plan’s function, along with additional resources that you can click on and read through if you need to. Click Next and fill in the details of your plan (i.e., The plan name, the type – whether it’s perpetual, seasonal or off-season, the start and end date). Click the green Next button once you have filled in all the information.
Step 4: In the next box, fill in the affected paddock. Please keep in mind that a dropdown list will allow you to choose from your list of paddocks. If you haven’t set that up yet, you won’t be able to use the dropdown list. Please add a paddock first (read more here on how to do that).

Once you’ve chosen your paddock, you can choose the priority and rating of this event, along with the event type (a dropdown list contains +30 different events from you to choose from). If you click the green button that now appears next to this event, you can choose specific dates for that event to start and end. This is useful to keep track of more than one event in your grazing planner.
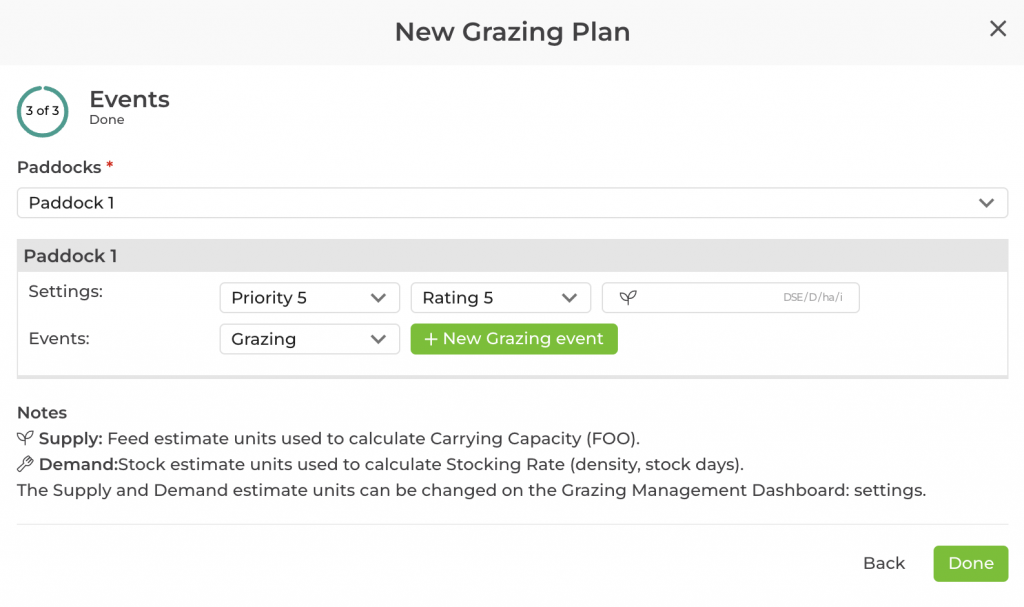
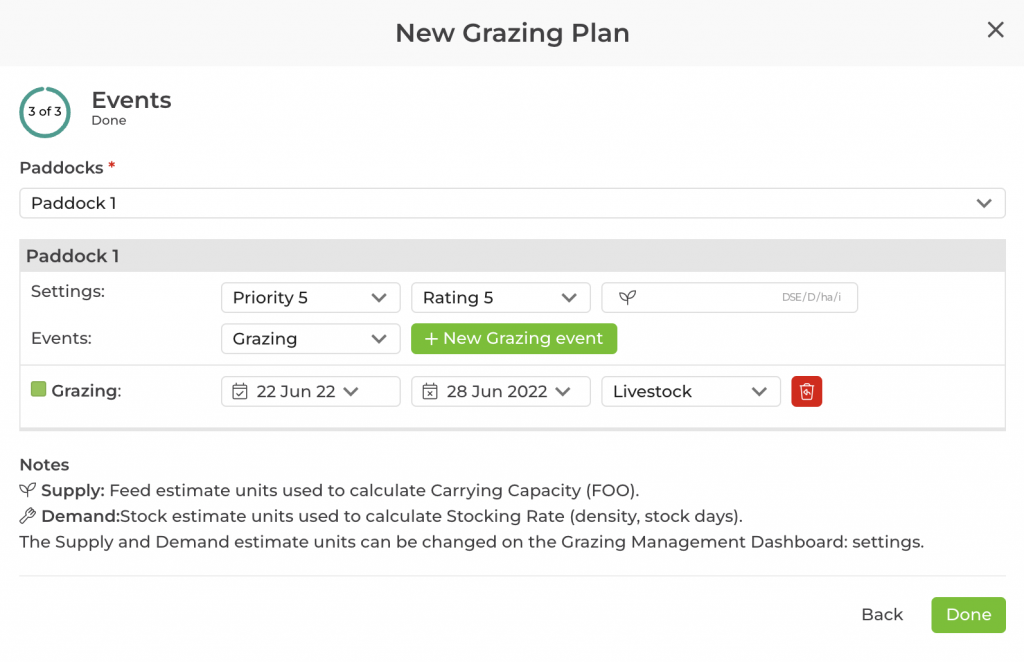
If you choose Grazing from the dropdown list of events, and click the green + New Grazing Event button, it will now add grazing to your pop-up box.
You can add a start and end date and also choose which livestock you want to add to this event. Click on the Livestock list to choose from the list of livestock/mob. You can choose more than one livestock/mob to add to the grazing event. Each livestock/mob will have its own start and end date that you can choose from. You can also choose the supply and demand measuring units used.

Click Done once you have finished to add this to your Grazing Management main page.